Step by Step Guide
Cleaning your spray unit might feel like the last thing you want to do after completing a job, but it’s essential for a number of reasons — and it’s also not nearly as difficult or as tedious as you probably think.
In this quick guide, we’ll give you an easy step-by-step process to follow to thoroughly clean your spray unit and to ensure you’re getting the absolute most out of your tools. Read on to learn more.
Why is cleaning your sprayer so important?
There’s nothing more frustrating than going to use a sprayer that hasn’t been cleaned; you’ll end up spending more time trying to get it working than you would’ve spent simply cleaning it in the first place.
Like any piece of mechanical equipment, that spray unit you spent your hard-earned money on requires proper care and upkeep if you want it to perform at the highest quality and to live its longest life.
Giving your sprayer a clean-out after every job keeps the tool operating at full capacity. You’re also minimizing the need for frequent maintenance and repairs, protecting your investment in the short-term and the long-term.
Allow a minimum of 30 minutes for cleaning.
How to save your paint and clean your sprayer
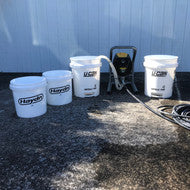
Here’s what you’ll need:
4 x 10-litre buckets of clean water
1 x scrubbing brush and/or scouring pad
Once you have the necessities, here’s what to do:
Bucket 1: Disassembly
- Turn the unit pressure down to zero, and switch the machine to ‘prime’ to release the pressure from the gun.
-
With the pressure down:
- Remove the spray tip and tip holder. Place in one of the water buckets.
- Undo the gun and remove the gun filter, and add both to the bucket with the tip and tip holder.
Bucket 2: Saving the paint
- Take the sprayer out of the paint, and set it into the second bucket of water.
- Hold the spray hose over your bucket of paint.
- Switch your spray unit back to the gun, and turn on to a slow level.
- Paint will start flowing back into your paint bucket as it’s pushed out by the water. Once the paint starts to get watery, turn off the spray unit.
- Put the lid on your paint bucket, and set it aside.
- Set your spray hose in a spot where wastewater can flow freely.
- With the sprayer still in the bucket of water, turn on the spray unit and allow it to run slowly.
- Scrub the suction and prime hose submerged in the water. (If you have a removable suction filter, you can take this off now and put it in Bucket 1 with the gun/tip/etc.)
Bucket 3: Hose and prime clean
- Once Bucket 2 is empty, turn off the pump, and place the spray unit in the third bucket of clean water.
- If you have a high-pressure filter, remove it now, and place it in the first bucket alongside the gun and the tip.
- Set spray unit to ‘prime’ so you can clean the prime hose. Run through half a bucket of water on this setting.
- Switch the unit back to ‘hose,’ and run until the water in the bucket is gone.
Back to Bucket 1: Cleaning the components
- Go to your first bucket, and hand-wash all the equipment inside.
- Put the clean filter back into the unit. Add the gun filter back to the gun, and reassemble the gun. Don’t put the gun tip on just yet. (Check that the tip holder still has the seat and saddle in place before tipping water out.)
Bucket 4: The deep clean
- Place the sprayer in that final clean bucket of water, and send water through the gun under pressure. This allows the line to fill with water and to get thoroughly cleaned out.
- As the sprayer pressurizes, give the gun quick, sharp squeezes, allowing it to pressurize between spraying.
- When there are about two litres of water left, put the tip back on. Spray one way. Reverse, and spray the other way.
The last litre: Protecting your investment
When there’s about a litre of water left in your last bucket, turn the unit off, switch it to prime, and add in a couple of capfuls of Wagner Pump Saver or Graco Pump Armor. Run the unit for approximately one minute.
These liquids act as lubricants and anti-corrosives and will further preserve your spray unit. Quick tip: if you don’t have Pump Saver or Pump Armor, you can use some regular antifreeze.
And you’re done! You can disconnect the hose now if you’d like.
Was this helpful? Are there any other step-by-step guides you’d like?
Email me at matt@millin.co.nz to let me know.
Originally Posted by Matt Piggin & Nikki Michaels on 2nd Apr 2020